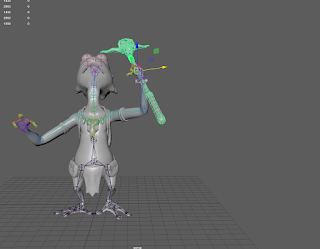
The first week of the semester Nick had us go in Zbrush and learn how to pose characters with the transpose tool and then go in Maya and put the character in a pose, with it rigged and skinned, then send it back to Zbrush to have the high poly sculpt be posed.
This is him with the transpose in zbrush
Then rendered out and put it in a picture. Nick didnt ask us to put it in a picture but i felt it would make it pop a little more.
Here he is in Maya Rigged, Skinned and posed.
This was actually fun to do and enjoyed finding an environment that he could fit into.


Not too bad on the posing, Top pose feels a bit off balance and leaning forward a bit too much. (char would fall over.) The choice of your image feels a bit too much, you would need to paint over everything to make sure the character fits within the background stylistically. the second image did a better job. There is an odd tangent on the second image with the staff and the face of your character, pull the arm away from the face a bit. Character needs to feel as if it grounded into the world better. Be careful just taking images off the web an incorporating it into your work this way, you can use the images as a starting point but you really need to alter things to the point that the average viewer can not tell where you go the image from. I think this is valid at the beginning stages of concept, but you really need to make the work your own. Other artist will pick up on you using others work and it will get real ugly real quick.
ReplyDeleteAlso I need to see your Maya behind the scenes stuff for full credit.
ReplyDelete